

🦍 How to Crochet a Gorilla Amigurumi Step-by-Step (Free Pattern) 🧶

Do you love original and fun amigurumis? 💕 Then you'll adore this project: today you'll learn how to crochet a gorilla amigurumi with this free step-by-step tutorial. 🦍✨ Perfect for both beginners and advanced crocheters, this design is ideal to add to your collection of crocheted animals.
This pattern was created by the talented amigurumi designer DIY Fluffies, known for her adorable and unique characters. Follow these clear instructions to make your own cute and friendly jungle friend in just a few steps.
🔗 Keep reading to start crocheting this furry jungle buddy!
Prefer a PDF download? You can purchase the PDF pattern on the Etsy store.
Finished Size:
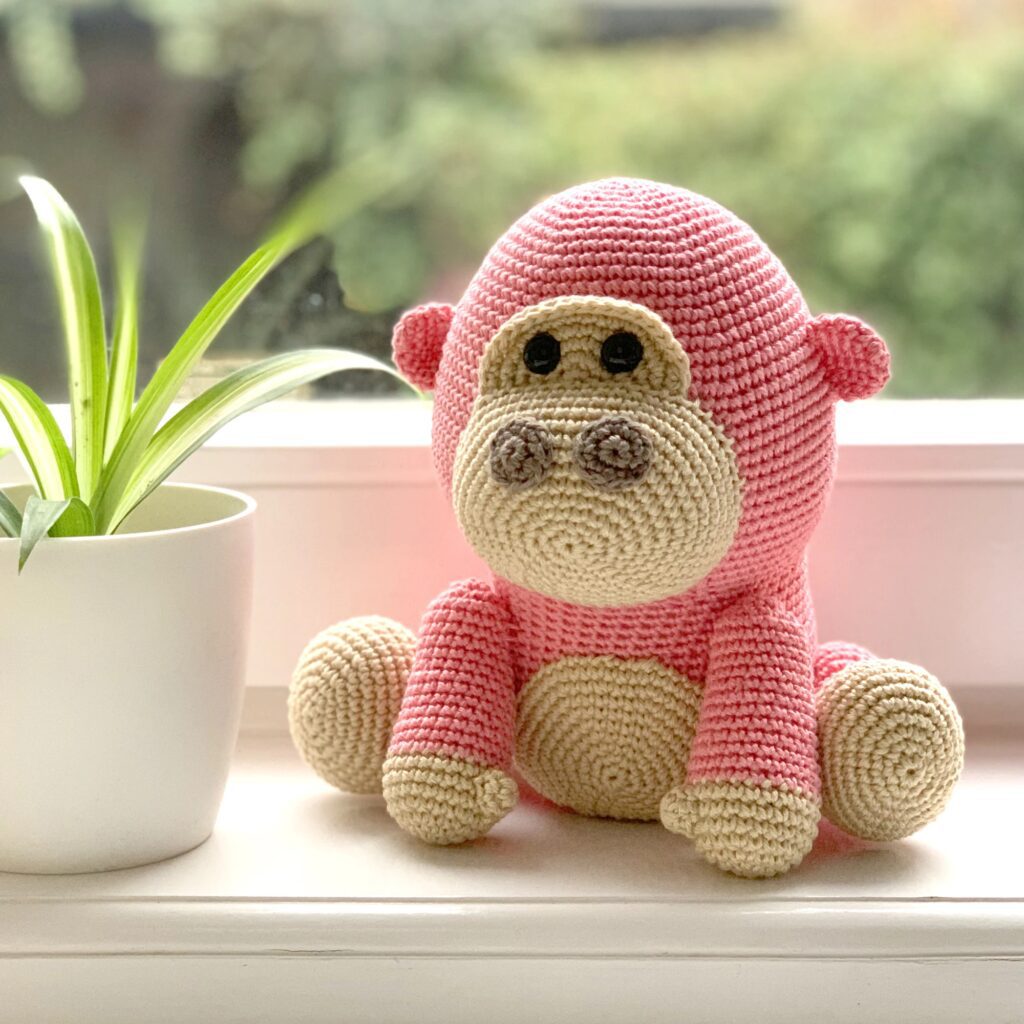
The gorilla measures 20 cm / 8 inches when made with sport-weight cotton yarn and a 2.5 mm hook.
MMaterials You'll Need:
These are the materials I used, but feel free to substitute yarn as desired. To make a smaller/larger version, adjust yarn weight and hook size accordingly.
Sport-weight cotton version (17 cm / 7 inches):
- 2x black cotton yarn (SMC Catania color #110) – 90 grams
- Gray cotton yarn (SMC Catania color #242) – 45 grams
- Polyester fiberfill stuffing
- 2.5 mm crochet hook
- 1 pair of 11 mm safety eyes
Supplies:
- Scissors
- Blunt-tip tapestry needles (size 16 or 17)
- Pins
TIP:
- For thick velvet yarn, use a 3.5 mm hook.
- For blanket yarn, use an 8.0 mm hook.
- For super bulky chenille yarn, use a 5 mm hook.
Abbreviations Used in This Free Gorilla Pattern:
- Rnd: Round
- st: Stitch
- sc: Single crochet
- sl st: Slip stitch
- dec: Decrease
- inc: Increase
- FLO: Front loops only
Pattern Instructions
Table Face (Gray yarn): Head and Body: Snout: Nose (make 2): Belly: Ear (make 2): Arm (make 2): Thumb (make 2): Back Leg (make 2):
Face (Gray yarn):
Use gray yarn
- Rnd 1: start with 8 sc in a magic ring (8)
- Rnd 2: increase in all 6 st (16)
- Mark the 10th and 17th stitch of round 3 with stitch markers.
- Rnd 3: sc in next 2 st, increase in next 4 st, sc in next 4 st, increase in next 4 st, sc in next 2 st (24)
- Rnd 4: sc in next 2 st, (sc in next st, increase in next st) repeat 4 times, sc in next 4 st, (sc in next st, increase in next st) repeat 4 times, sc in next 2 st (32)
- Rnd 5: sc in next 2 st, (sc in next 2 st, increase in next st) repeat 4 times, sc in next 4 st, (sc in next 2 st, increase in next st) repeat 4 times, sc in next 2 st (40)
- Rnd 6: sc in next 13 st, FLO sc in next 2 st, FLO hdc in next 12 st, FLO sc in next 2 st, sc in next 11 st (40)
- FLO: Front loops only
- Slst in next st. Cut yarn, leaving a long tail for sewing.
Head and Body:
Use black yarn
- Rnd 1: start with 6 sc in a magic ring (6)
- Rnd 2: increase in all 6 st (12)
- Rnd 3: (sc in next st, increase in next st) repeat 6 times (18)
- Rnd 4: (sc in next 2 st, increase in next st) repeat 6 times (24)
- Rnd 5: (sc in next 3 st, increase in next st) repeat 6 times (30)
- Rnd 6: (sc in next 4 st, increase in next st) repeat 6 times (36)
- Rnd 7: (sc in next 5 st, increase in next st) repeat 6 times (42)
- Rnd 8: (sc in next 6 st, increase in next st) repeat 6 times (48)
- Rnd 9: sc in all 48 st (48)
- Rnd 10: (sc in next 7 st, increase in next st) repeat 6 times (54)
- Rnd 11 - 13: sc in all 54 st (54)
- Rnd 14: (sc in next 8 st, increase in next st) repeat 6 times (60)
- Rnd 15: sc in all 60 st (60)
- Rnd 16: (sc in next 9 st, increase in next st) repeat 6 times (66)
- Rnd 17: sc in all 66 st (66)
- Mark the 31st and 42nd stitch of round 18 with stitch markers.
- Rnd 18: sc in all 66 st (66)
- Rnd 19: (sc in next 10 st, increase in next st) repeat 6 times (72)
- Rnd 20: sc in all 72 st (72)
- Rnd 21: (sc in next 11 st, increase in next st) repeat 6 times (78)
- Rnd 22 - 29: sc in all 78 st (78)
- Rnd 30: (sc in next 11 st, decrease) repeat 6 times (72)
- Rnd 31: sc in all 72 st (72)
Attach the face to the head between rounds 13 and 24, centered between the marked stitches on the head. Insert the safety eyes through the face and head fabric. You can use a toothpick to create a small hole in the face and head fabric to insert the safety eyes more comfortably at the marked points. Now, sew the back loops of stitches 14 to 39 from round 6 of the face to the head.

Snout:
Use gray yarn
- Rnd 1: start with 6 sc in a magic ring (6)
- Rnd 2: increase in all 6 st (12)
- Rnd 3: (sc in next st, increase in next 3 st, sc in next 2 st) repeat 2 times (18)
- Rnd 4: sc in next st, (sc in next st, increase in next st) repeat 3 times, sc in next 3 st, (sc in next st, increase in next st) repeat 3 times, sc in next 2 st (24)
- Rnd 5: sc in next st, (sc in next 2 st, increase in next st) repeat 3 times, sc in next 3 st, (sc in next 2 st, increase in next st) repeat 3 times, sc in next 2 st (30)
- Rnd 6: sc in next st, (sc in next 3 st, increase in next st) repeat 3 times, sc in next 3 st, (sc in next 3 st, increase in next st) repeat 3 times, sc in next 2 st (36)
- Rnd 7: sc in next st, (sc in next 4 st, increase in next st) repeat 3 times, sc in next 3 st, (sc in next 4 st, increase in next st) repeat 3 times, sc in next 2 st (42)
- Rnd 8: sc in next st, (sc in next 5 st, increase in next st) repeat 3 times, sc in next 3 st, (sc in next 5 st, increase in next st) repeat 3 times, sc in next 2 st (48)
- Rnd 9: sc in next st, (sc in next 6 st, increase in next st) repeat 3 times, sc in next 3 st, (sc in next 6 st, increase in next st) repeat 3 times, sc in next 2 st (54)
- Rnd 10 - 12: sc in all 54 st (54)
Cut yarn, leaving a long tail for sewing. Sew the snout to the head with the top touching round 1 of the face and the bottom above round 35 of the head.
Position the snout between the marked stitches from round 18. Stuff the snout with fiber and sew it to the head of your Gorilla Amigurumi.
Nose (make 2):
Use black yarn
- Rnd 1: start with 6 sc in a magic ring (6)
- Rnd 2: increase in all 6 st (12)
- Slst in next st. Cut yarn, leaving a long tail for sewing.
Sew the nostrils between rounds 5-10 of the snout, with 1 stitch between them.
Belly:
Use gray yarn
- Rnd 1: start with 6 sc in a magic ring (6)
- Rnd 2: increase in all 6 st (12)
- Rnd 3: (sc in next st, increase in next st) repeat 6 times (18)
- Rnd 4: (sc in next 2 st, increase in next st) repeat 6 times (24)
- Rnd 5: (sc in next 3 st, increase in next st) repeat 6 times (30)
- Rnd 6: (sc in next 4 st, increase in next st) repeat 6 times (36)
- Rnd 7: (sc in next 5 st, increase in next st) repeat 6 times (42)
- Rnd 8: (sc in next 2 st, increase in next st) repeat 14 times (56)
- Rnd 9: sc in all 56 st (56)
Cut yarn, leaving a long tail for sewing. Sew the belly to the body between rounds 41-58.
Ear (make 2):
Use black yarn
- Rnd 1: start with 6 sc in a magic ring (6)
- Rnd 2: increase in all 6 st (12)
- Rnd 3: (sc in next 5 st, increase in next st) repeat 2 times (14)
- Rnd 4: sc in all 14 st (14)
Cut yarn, leaving a long tail for sewing. Sew the ears between rounds 17-23 to the sides of the head of your Gorilla Amigurumi.
Arm (make 2):
Start with gray yarn
- Rnd 1: start with 6 sc in a magic ring (6)
- Rnd 2: increase in all 6 st (12)
- Rnd 3: (sc in next st, increase in next st) repeat 6 times (18)
- Rnd 4: (sc in next 2 st, increase in next st) repeat 6 times (24)
- Rnd 5 - 7: sc in all 24 st (24)
- Switch to black yarn. Learn how to change colors with my free color change tutorial.
- Rnd 8 - 10: sc in all 24 st (24)
- Rnd 11: (sc in next 6 st, decrease) repeat 3 times (21)
- Rnd 12 - 14: sc in all 21 st (21)
- Rnd 15: (sc in next 5 st, decrease) repeat 3 times (18)
- Rnd 16 - 20: sc in all 18 st (18)
- Stuff the arm with fiber.
- Rnd 21: (sc in next st, decrease) repeat 6 times (12)
- Rnd 22: decrease 6 times (6)
Cut yarn, leaving a yarn tail. Use your yarn needle to weave the tail through the front loop of each remaining stitch and pull tight to close. Hide the yarn end. Sew the arms to the front of the body, just below round 38, with 10 stitches between them.

Thumb (make 2):
Use gray yarn
- Rnd 1: start with 6 sc in a magic ring (6)
- Rnd 2: sc in all 6 st (6)
Cut yarn, leaving a long tail for sewing. Sew the thumbs to the arms between rounds 4-8.
Back Leg (make 2):
Start with gray yarn
- Rnd 1: start with 6 sc in a magic ring (6)
- Rnd 2: increase in all 6 st (12)
- Rnd 3: sc in next st, increase in next 3 st, sc in next 3 st, increase in next 3 st, sc in next 2 st (18)
- Rnd 4: sc in next st, (sc in next st, increase in next st) repeat 3 times, sc in next 3 st, (sc in next st, increase in next st) repeat 3 times, sc in next 2 st (24)
- Rnd 5: sc in next st, (sc in next 2 st, increase in next st) repeat 3 times, sc in next 3 st, (sc in next 2 st, increase in next st) repeat 3 times, sc in next 2 st (30)
- Rnd 6: sc in next st, (sc in next 3 st, increase in next st) repeat 3 times, sc in next 3 st, (sc in next 3 st, increase in next st) repeat 3 times, sc in next 2 st (36)
- Rnd 7 - 10: sc in all 36 st (36)
- Rnd 11: sc in next 28 st, switch to black yarn, sc in next 8 st (36)
- Rnd 12: sc in next st, (sc in next 3 st, decrease) repeat 3 times, sc in next 3 st, (sc in next 3 st, decrease) repeat 3 times, sc in next 2 st (30)
- Rnd 13: (sc in next st, decrease) repeat 6 times, sc in next 12 st (24)
- Rnd 14: decrease 6 times, sc in next 12 st (18)
- Rnd 15 - 17: sc in all 18 st (18)
- Stuff with fiber and continue stuffing as you go.
- Rnd 18: (sc in next 2 st, increase in next st) repeat 6 times (24)
- Rnd 19 - 20: sc in all 24 st (24)
- Rnd 21: (sc in next 2 st, increase in next st) repeat 3 times, sc in next 15 st (27)
- Rnd 22 - 24: sc in all 27 st (27)
- Rnd 25: (sc in next 2 st, decrease) repeat 3 times, sc in next 15 st (24)
- Rnd 26: sc in all 24 st (24)
- Rnd 27: (sc in next 2 st, decrease) repeat 6 times (18)
- Rnd 28: (sc in next st, decrease) repeat 6 times (12)
- Rnd 29: decrease 6 times (6)
- Cut yarn, leaving a long yarn tail.
Use your yarn needle to weave the tail through the front loop of each remaining stitch and pull tight to close. Hide the yarn end. Sew the legs to the sides of the body, between rounds 47-54.
Congratulations! 🎉 You've finished your crocheted gorilla amigurumi, and now you have in your hands an adorable doll, made with lots of love and creativity. 💖
This design was created by DIY Fluffies, so if you liked this project and want to discover more amazing patterns, we invite you to follow her on social media:
💬 Don't forget to share your creations on social media and tag DIY Fluffies so she can see your version of the little gorilla 🦍💬
#AmigurumiGorilla #FreeCrochet #DIYFluffies
If you’d like to explore more articles like 🦍 How to Crochet a Gorilla Amigurumi Step-by-Step (Free Pattern) 🧶, feel free to visit the Amigurumis section.
How to Crochet an Adorable Easter Chick Amigurumi 🧶🐤 with Its Shell and Little Eggs – FREE Step-by-Step Tutorial

🐉💚 How to Crochet a Cute Little Amigurumi Dragon – FREE Step-by-Step Tutorial

🐍✨ How to Crochet an Adorable Bow-Wearing Amigurumi Snake – FREE Step-by-Step Tutorial

✨ How to Crochet an Adorable Gingerbread Man Christmas Cookie 🍪🧶 – FREE Step-by-Step Tutorial

🦇 Free Step-by-Step Amigurumi Bat Crochet Tutorial

How to Crochet a Labubu Amigurumi
Suscribirse
0 Comments
You might also like