

🧸✨ Free Tutorial: How to Crochet a Teddy Bear Amigurumi with a Sweater

Would you like to crochet an adorable teddy bear with a sweater? 🧸💖 In this step-by-step tutorial, you’ll learn how to make a cute amigurumi, perfect for gifting, selling, or adding to your collection. 🥰
This free pattern is ideal for intermediate crocheters and adventurous beginners looking to improve their skills. You’ll learn how to crochet each part of the bear, from its little legs to its striped sweater. 🎨 Follow the instructions and have fun creating your very own Buddy the Bear!
📌 Don’t forget to follow the creator of this pattern, Lalabuyz, on her social media for more amazing designs:
🔗 Etsy | Ravelry | Ribblr | Instagram
Table
Pattern Notes
Work in continuous rounds using a stitch marker. The toy is made by first crocheting two legs, then joining them and continuing with the body and head. The other body parts are made separately and sewn on later. The finished toy measures approximately 25–27 cm (10–10.6 inches) tall from the top of the ear to the feet when using the materials specified in this crochet pattern.
Feel free to use your preferred yarn and hook size for the bear. The result will be larger or smaller but will maintain the same proportions. Make sure to use tight enough tension to avoid large gaps between stitches.
If you have any trouble understanding the pattern, don’t hesitate to contact me.
Materials
- Scissors.
- 100% acrylic yarn in three colors. I used Hayfield Bonus DK (100% acrylic/machine washable). Colors used: beige, white, and fern green. Plus a small amount of dark yarn for embroidering the nose.
- 3 mm crochet hook.
- Polyester toy stuffing.
- Safety eyes.
- Stitch marker or a scrap piece of yarn.
- Tapestry needle.
Abbreviations
- CH: Chain
- SL ST: Slip stitch
- SC: Single crochet
- HDC: Half double crochet
- DEC: Decrease
- INC: Increase
- FPDC: Front post double crochet
- BPDC: Back post double crochet
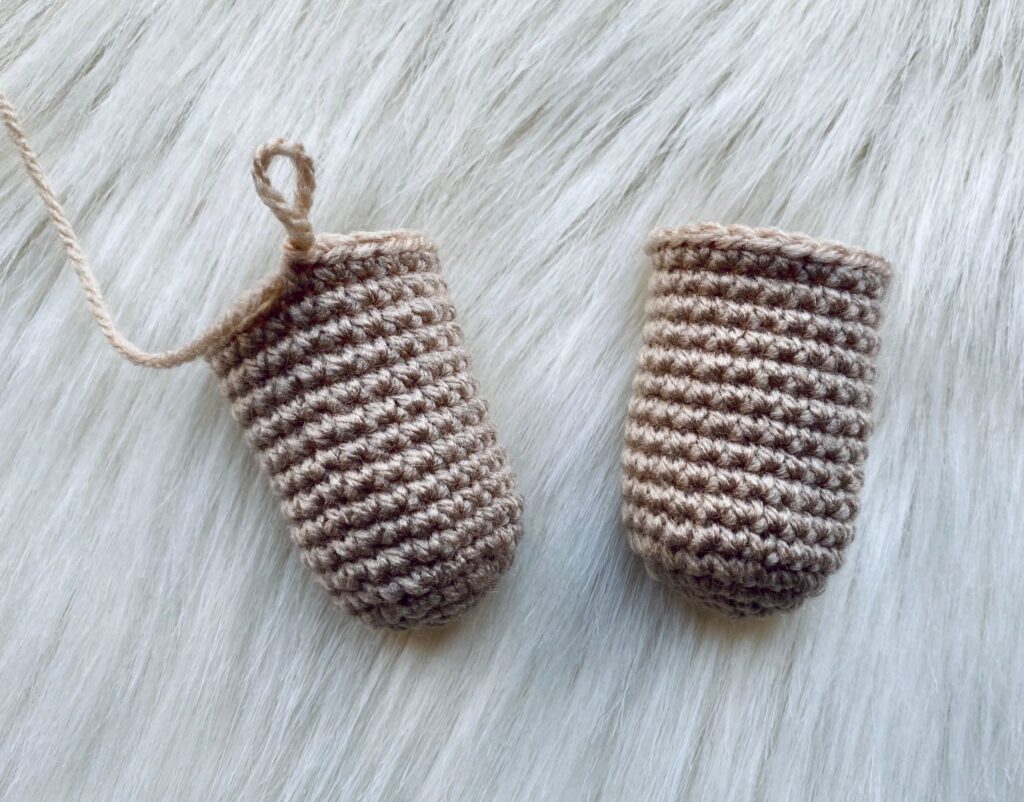
Legs
You’ll need 2 legs, but only one should be closed. Keep the hook in the second leg, as we’ll join them to make the body section.
LEG #1
- Round 1: Magic ring, make 1 CH (does not count as a stitch), 6 SC into the magic ring (6 stitches).
- Round 2: INC x 5 (12 stitches).
- Round 3: (1 INC, 1 SC) x 6 around (18 stitches).
- Round 4: (1 INC, 2 SC) x 6 (24 stitches).
- Rounds 5–15: SC around (24 stitches).
Cut the yarn, leave a long tail, and fasten off. Place a stitch marker.
LEG #2
Follow the instructions for LEG #1. Remember NOT to fasten off. Place a stitch marker. Continue with the JOINING INSTRUCTIONS once both legs are done.
JOINING INSTRUCTIONS
Both pieces have a total of 24 stitches each plus 1 extra stitch made. After joining, you’ll have 50 stitches total (24 per leg + 1 extra CH worked on both sides).
*(1 + 24 + 1 + 24 = 50)*
- Round 16: Join the legs.
- Step 1: On LEG #2, make 1 CH.
- Step 2: SC into LEG #1 where the stitch marker is (first stitch of the last round made).
- Step 3: SC around LEG #1 (24 stitches).
- Step 4: SC into one loop of the 1 CH created (1 stitch).
- Step 5: SC around LEG #2 (24 stitches).
- Step 6: SC into the other side of the 1 CH created (1 stitch).
Total of 50 stitches made. Now is the time to stuff the legs before moving on to the body.

Body
Continue working in rounds.
- Round 17: 50 SC around (50 stitches).
- Round 18: (11 INC, 9 SC) x 5 (55 stitches).
- Rounds 19–22: SC around (55 stitches).
SWEATER
Switch to green yarn and begin crocheting the sweater.
- Round 23: SC in all 55 stitches (55 stitches).
- Round 24: SC in all 55 stitches through the back loop only (55 stitches).
Switch to white yarn. - Rounds 25–26: SC in all 55 stitches (55 stitches).
- Round 27: Alternate colors (4 SC in white, 1 SC in green) x 11 (55 stitches).
- Rounds 28–29: SC in all 55 stitches (55 stitches).
Switch to green yarn. - Round 30: SC in all 55 stitches (55 stitches).
- Round 31: (9 SC, 1 DEC) x 5 (50 stitches).
- Round 32: SC in all 50 stitches (50 stitches).
Switch to white yarn. - Round 33: SC in all 50 stitches (50 stitches).
- Round 34: (8 SC, 1 DEC) x 5 (45 stitches).
- Round 35: SC in all 45 stitches (45 stitches).
Switch to green yarn. - Round 36: SC in all 45 stitches (45 stitches).
- Round 37: (7 SC, 1 DEC) x 5 (40 stitches).
- Round 38: Alternate colors (4 SC in green, 1 SC in white) x 8 (40 stitches).
- Round 39: SC in all 40 stitches (40 stitches).
- Round 40: (6 SC, 1 DEC) x 5 (35 stitches).
Switch to white yarn. - Round 41: SC in all 35 stitches (35 stitches).
- Round 42: (5 SC, 1 DEC) x 5 (30 stitches).
Switch to green yarn. - Round 43: SC in all 30 stitches (30 stitches).

Head
Switch to brown yarn and continue working on the head.
- Round 44: SC in all 30 stitches through the back loop only (30 stitches).
- Round 45: SC in all 30 stitches (30 stitches).
- Round 46: (5 SC, 1 INC) x 5 (35 stitches).
- Round 47: SC in all 35 stitches (35 stitches).
- Round 48: (6 SC, 1 INC) x 5 (40 stitches).
- Round 49: SC in all 40 stitches (40 stitches).
- Round 50: (7 SC, 1 INC) x 5 (45 stitches).
- Rounds 50–56: SC in all 45 stitches (45 stitches).
Remember to add stuffing as you go. Insert safety eyes between rounds 53 and 54, leaving 8–9 stitches between them. Eye placement depends on your preference, but I always try to center them on the head. - Round 57: (7 SC, 1 DEC) x 5 (40 stitches).
- Round 58: SC in all 40 stitches (40 stitches).
- Round 59: (6 SC, 1 DEC) x 5 (35 stitches).
- Round 60: (5 SC, 1 DEC) x 5 (30 stitches).
- Round 61: (3 SC, 1 DEC) x 6 (24 stitches).
- Round 62: (2 SC, 1 DEC) x 6 (18 stitches).
- Round 63: (1 SC, 1 DEC) x 6 (12 stitches).
- Round 64: (1 SC, 1 DEC) x 3 (6 stitches).
Cut the yarn, leaving a long tail. Add a bit more stuffing before closing. Weave the yarn through the front loops of the remaining 6 stitches and pull tight to close the hole. Hide the tail.

Arms
Make two arms, both identical. Start with brown yarn.
- Round 1: Magic ring, 1 CH (does not count as a stitch), 6 SC into the ring (6 stitches).
- Round 2: INC x 6 (12 stitches).
- Round 3: (1 SC, 1 INC) x 6 (18 stitches).
- Round 4: (5 SC, 1 INC) x 3 (21 stitches).
- Rounds 5–6: SC in all 21 stitches (21 stitches).
- Round 7: DEC x 3, 15 SC (18 stitches).
Switch to green yarn. - Rounds 8–12: SC in all 18 stitches (18 stitches).
Switch to white yarn. - Round 13: (7 SC, DEC) x 2 (16 stitches).
- Rounds 14–15: SC in all 16 stitches (16 stitches).
Switch to green yarn. - Rounds 16–17: SC in all 16 stitches (16 stitches).
- Round 18: (6 SC, DEC) x 2 (14 stitches).
Switch to white yarn. - Rounds 19–23: SC in all 14 stitches (14 stitches).
Switch to green yarn. - Round 24: SC in all 14 stitches (14 stitches).
- Round 25: (5 SC, DEC) x 2 (12 stitches).
Stuff the arms with polyester filling. Flatten the edges and make 6 SC through both layers. Fasten off, leaving a long tail to sew the arms to the body. Attach the arms at the level of Round 43 of the body (the last green row of the sweater).

Ears
Make two, both identical. Use brown yarn.
- Round 1: Magic ring, 1 CH (does not count as a stitch), 6 SC into the ring (6 stitches).
- Round 2: INC x 6 (12 stitches).
- Round 3: (3 SC, 1 INC) x 3 (15 stitches).
- Rounds 4–8: SC in all 15 stitches (15 stitches).
Fasten off, leaving a long tail to sew the ears to the head. Fold them slightly when attaching.

Snout
Use brown yarn.
- Round 1: Magic ring, 1 CH (does not count as a stitch), 6 SC into the ring (6 stitches).
- Round 2: INC x 6 (12 stitches).
- Round 3: (1 SC, 1 INC) x 6 (18 stitches).
- Round 4: (5 SC, 1 INC) x 3 (21 stitches).
- Rounds 5–6: SC in all 21 stitches (21 stitches).
Fasten off, leaving a long tail for sewing. Embroider a nose with dark yarn or sew on a black button. Attach the snout between the eyes, just above the sweater neckline.

Sweater Edging
NECKLINE
Attach green yarn to a front loop of Round 44 (the first round of the HEAD).
- Round 1: 3 CH (counts as HDC), HDC in the next 29 stitches, SL ST (30 stitches).
- Round 2: 2 CH, (FPDC, BPDC) x 15, SL ST (30 stitches).
- Round 3: 2 CH, (FPDC, BPDC) x 15, SL ST (30 stitches).
Cut the yarn, fasten off, and weave in the end.
BOTTOM EDGING
Attach green yarn to a front loop of Round 24 of the body.
- Round 1: 3 CH (does not count as HDC), HDC in the next 54 stitches, SL ST (54 stitches).
- Round 2: 2 CH, (FPDC, BPDC) x 27, SL ST (54 stitches).
- Round 3: 2 CH, (FPDC, BPDC) x 27, SL ST (54 stitches).
Cut the yarn, fasten off, and weave in the end.

Congratulations! 🥳
If you’ve made it this far, your sweater-wearing amigurumi bear is complete. Isn’t it adorable? 😍 Now you can customize it with different colors or add special embroidery details. ✨
📢 Share your creation on social media and tag @lalabuyz.patterns on Instagram so we can see it! 📷💛 We love watching each amigurumi come to life!
🔔 Don’t forget to follow Lalabuyz on her shops and social media for more free and exclusive patterns. 🧵💖
If you enjoyed this tutorial, leave a comment and share it with your crochet friends! 🧸💕
If you’d like to explore more articles like 🧸✨ Free Tutorial: How to Crochet a Teddy Bear Amigurumi with a Sweater, feel free to visit the Amigurumis section.
How to Crochet an Adorable Easter Chick Amigurumi 🧶🐤 with Its Shell and Little Eggs – FREE Step-by-Step Tutorial

🐉💚 How to Crochet a Cute Little Amigurumi Dragon – FREE Step-by-Step Tutorial

🐍✨ How to Crochet an Adorable Bow-Wearing Amigurumi Snake – FREE Step-by-Step Tutorial

✨ How to Crochet an Adorable Gingerbread Man Christmas Cookie 🍪🧶 – FREE Step-by-Step Tutorial

🦇 Free Step-by-Step Amigurumi Bat Crochet Tutorial

How to Crochet a Labubu Amigurumi
Suscribirse
0 Comments
You might also like